Analyzing your sudo session recordings with One Identity's SPS
Sudo is an open source application allowing you to execute commands as another user. Safeguard for Privileged Sessions (SPS) by One Identity is commercial software that allows you to control, monitor and record privileged access. Starting with the upcoming SPS version 6.10 you will be able to collect and analyze sudo session recordings in SPS.
Session (I/O log) recording has been present in sudo for quite some time, but recordings were only saved locally. Replaying a sudo session like a movie was useful even locally, but a malicious user with shell access could easily delete the recordings. Starting with sudo version 1.9, it is possible to collect sudo session recordings centrally, which makes deleting session recordings a lot more difficult.
SPS works by monitoring and controlling network protocols. It can peek inside encrypted protocols, control which user can access a service and what features of a given protocol may be used. It can record and index what is going on within a session, print the commands executed and play back a session in a browser or in a dedicated desktop application like a movie. All of this without installing an agent on the clients or the servers, and–in most cases–without changing the user’s work flow.
The sudo SPS integration is the first time SPS collects session data from an “agent” instead of by analyzing a network protocol. Configuration on the sudo side is the same as when sending logs to the regular sudo_logsrvd server. On the SPS side, sudo I/O logs (session recordings) are carefully analyzed and indexed. What this means for the user is that all sessions are available in a central repository and SPS can list commands executed during a sudo session and search for text strings that may have appeared on the screen. The auditor has the ability to reconstruct a potential chain of attack by having all details of sessions in multiple protocols across the network and sudo I/O log data is just the latest piece of the puzzle.
For this blog I used a pre-release version of SPS. While most features are ready and we do not expect any more user-visible changes, there might be some minor differences compared to the GA release.
You do not have to learn anything new to configure sudo for SPS. Just run visudo and append a couple of lines to your configuration. The options are the same ones used for configuring sudo to send I/O logs to a sudo_logsrvd server.
Defaults ignore_iolog_errors
Defaults log_servers = 172.16.167.129:30343
Defaults log_output
Defaults log_input
What do these settings do?
-
By default, sudo will not run if none of the central servers collecting session logs are available. This can enhance security, however it makes fixing a problem impossible when the network is unavailable, even from the console. You can change this behavior using the
ignore_iolog_errorsoption. -
Specify one or more log servers using log_servers, where to send session recordings. In this case use the IP address of your SPS installation.
-
The log_output setting enables recording what appears on the terminal.
-
The log_input setting makes sure that user input (what the user types) is also recorded.
If you are doing more than just a test, you should enable also enable TLS encryption to secure the connection to sudo_logsrvd (not covered here).
You can configure SPS through a web-based graphical user interface. On the left side menu choose “Sudo iolog Control” and “Connections”:
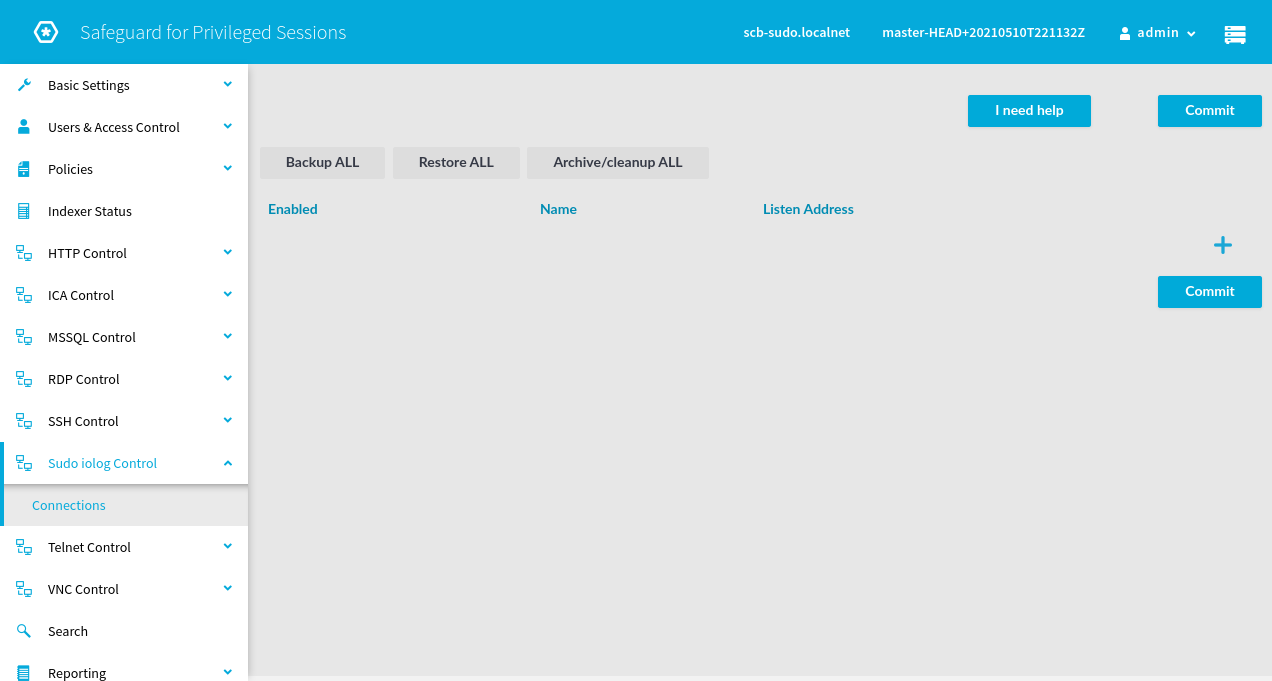
You can create a new sudo connection policy (note: the original focus of SPS is network connections) by clicking on the large + sign in the upper right part of the screen:
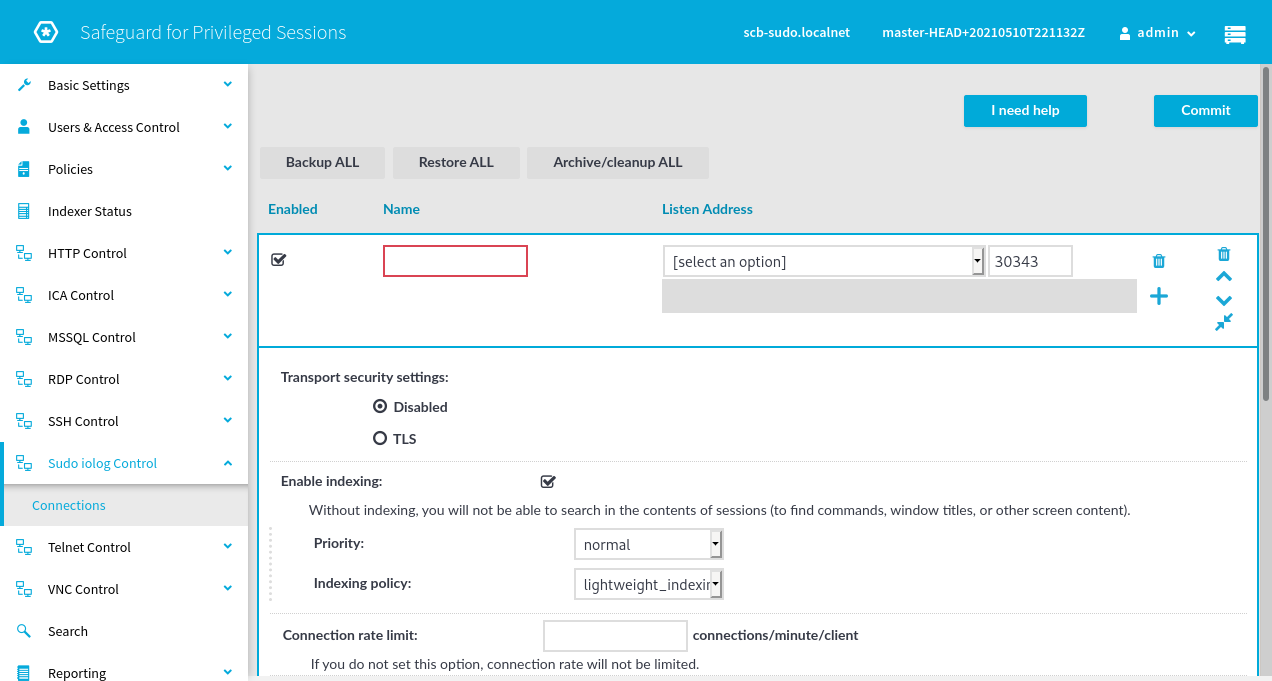
Give the connection policy a name, for example “mysudo”. SPS appliances may have multiple network interfaces. Choose an IP address from the drop down list where sudo clients should send I/O logs, and change the port number if the default value does not work for you.
For a quick test TLS can remain disabled, for a production environment the use of encryption is strongly recommended.
Without indexing, all that SPS can provide for sudo is a fancy player for the session recordings, browser-based instead of CLI. You should enable indexing to gain more insight into your sessions and to be able to search them. The default lightweight_indexing will only index commands, not the entire contents of the screen. If full indexing is enabled, it is possible to search all screen content.
The rest of the settings are not specific to sudo I/O log support, but are generic SPS settings. Check the SPS manual to learn more about them.
Once you’ve finished configuring the sudo connection policy, click the Commit button to save the settings. You are now ready test it out.
On the host where you configured sudo to send I/O logs to SPS, try running a few commands through sudo. I even mistyped my password just to see the results in SPS. I started commands both by appending the command and parameters to the sudo command line and also by starting a shell.
Once you have executed a couple of commands, it’s time to see the results in the SPS search interface. Click Search on the left side menu. You should see the search page with the last couple of sessions listed on screen:

You can see two sessions in the above screen shot: one failed due to an authentication failure and the other is still active. If there are many sessions you can narrow down the results using the search boxes at the top of the screen.
To view more details about a session, click on the three dots close to the right end of the search results. Depending on the indexer settings, and how busy the indexers are on SPS, you might already see some extra information about a running session.
The Overview tab displays basic session information and potentially also a list of commands executed. The Details tab shows additional information about the session.
The Timeline tab shows detailed information about commands during the sessions along with related screen shots:
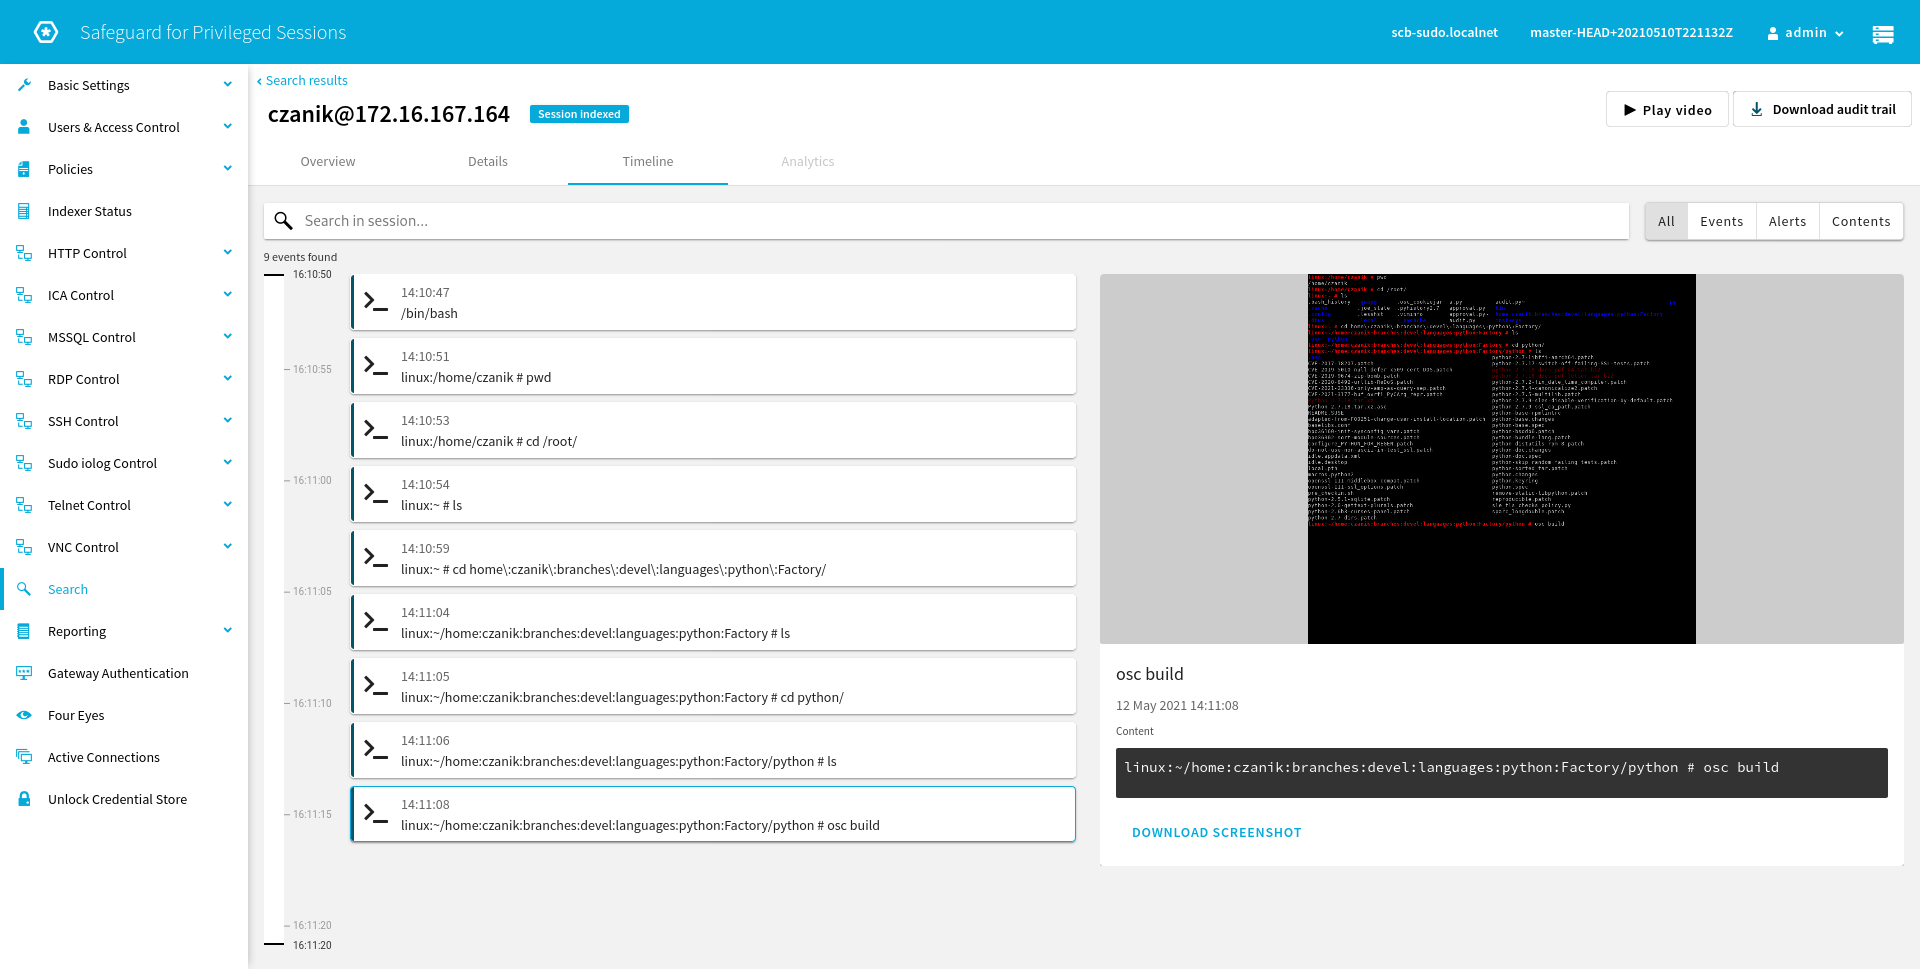
You can play back recorded sessions using a browser-based player or by using a dedicated desktop application. Click Play Video to play the recording back using the browser-based player. The next screen shot shows the player when it reached the same point in the session as on the previous screen shot:

As you can see, at the bottom of the screen you can even follow the keystrokes of the user running sudo. Keystrokes may include sensitive information, like passwords, so they can be encrypted using a dedicated certificate.
This blog should be enough to whet your appetite, but it is not an in depth review of SPS. If you want to learn more about SPS and its sudo integration, visit the SPS website where you can find more information and also request a demo.
If you would like to be notified about new posts and sudo news, sign up for the sudo blog announcement mailing list.